
Finding yourself out in the cold, with temperatures dropping and a long night ahead, brings up one critical need: shelter. Building a reliable shelter in cold weather isn’t just about staying comfortable; it can mean the difference between life and death. Cold weather survival demands knowledge of effective shelter-building techniques that protect you from wind, snow, and extreme cold. By understanding and practicing these methods, you’ll be prepared to face harsh outdoor environments and keep warm, dry, and safe, even when nature turns unforgiving.
In this guide, we’ll cover everything you need to know about building shelters in cold conditions, from essential materials to practical building methods. Whether you’re a seasoned outdoor enthusiast or just getting started, mastering these techniques will give you the skills to protect yourself in even the most challenging weather conditions.
Why Cold Weather Shelter Matters
When temperatures plummet, your body quickly loses heat to the surrounding environment, especially if you’re exposed to wind or wet conditions. This makes shelter not just a comfort but a necessity. Hypothermia is a serious risk in cold weather, and exposure to extreme cold can lead to frostbite or other severe injuries. By creating an insulated, wind-blocking shelter, you can drastically reduce heat loss, retain body warmth, and create a controlled environment that keeps you safer and more comfortable. A good shelter keeps you dry, protected from wind, and minimizes heat loss.
Factors to Consider When Building a Cold Weather Shelter
- Location: Avoid low-lying areas prone to cold air accumulation or areas near water. Opt for higher ground with natural wind protection, like tree cover or rock formations.
- Insulation: Cold weather shelters need materials that trap air and create a barrier against the elements, such as snow, pine branches, or dead leaves.
- Time and Energy: Some shelters are quick to set up, while others require more time and effort. Choose a shelter type that matches your available time, energy level, and resources.
- Ventilation: In cold weather shelters, ventilation is key to prevent moisture buildup from your breath, which can make the inside damp and colder.
Helpful Hint:
Before starting your shelter, assess your energy and available resources. Sometimes a simple windbreak might be enough, while other times, you may need a more elaborate structure to keep warm and dry.
Types of Cold Weather Shelters
There are several types of shelters you can construct in cold environments, each with its own strengths and weaknesses. Knowing the right one to build depends on the materials available, the terrain, and the time you have. Here’s a breakdown of some effective cold-weather shelter types.
1. Snow Cave
The snow cave is a classic shelter for snowy environments. Using snow as insulation, it traps body heat, creating a surprisingly warm space even in frigid temperatures. A snow cave is ideal for areas with deep snow where digging is feasible.
How to Build a Snow Cave
- Find a suitable snowdrift: Look for a snowdrift that’s at least shoulder-height and densely packed, making it easier to carve out a cave.
- Start digging an entrance tunnel: Begin at the base and dig inward, creating a tunnel. Once inside, hollow out a larger space for sleeping.
- Make a sleeping platform: Dig a raised platform inside the cave for sleeping. Cold air sinks, so having a higher platform keeps you warmer.
- Add ventilation: Use a stick or small branch to poke a hole from the inside to the outside, creating airflow to prevent carbon dioxide buildup.
Snow caves can be highly effective but require time, energy, and stable snow. They are also best used when you’re confident about snow stability to avoid collapse.
2. Lean-To Shelter with Reflective Fire
The lean-to shelter is one of the most straightforward options for cold weather survival and works well when combined with a reflective fire. This setup is ideal when resources like fallen branches and large rocks are available, providing a windbreak on one side and warmth from a fire on the other.
How to Build a Lean-To Shelter
- Find two strong support trees: Select two trees about six feet apart as the base of your shelter.
- Lay a ridgepole: Place a sturdy branch or pole horizontally between the two trees at shoulder height.
- Create a slanted roof: Lean branches against the ridgepole at a 45-degree angle, layering them tightly to block wind and snow.
- Add insulation: Place leaves, pine boughs, or any available insulation materials on top of the slanted roof to trap heat and reduce drafts.
The lean-to works well with a reflective fire positioned in front of the open side, bouncing warmth back into the shelter. It’s a quick build that offers both warmth and wind protection, ideal for cold, dry conditions.
3. Quinzhee Shelter
A quinzhee is similar to a snow cave but is built by piling snow rather than digging into a snowbank. It’s suitable for areas with less snow depth since you’re building up rather than carving into a bank.
How to Build a Quinzhee Shelter
- Pile up loose snow: Start by creating a mound of loose snow, shaping it into a dome about six feet high.
- Let the snow settle: Allow the snow to settle for at least 1-2 hours. This compacts it, making it stronger for carving.
- Carve out an entrance: Dig an entrance on one side and start hollowing out the interior. Work slowly to prevent collapse.
- Add ventilation: Just like with the snow cave, make sure to create a ventilation hole to let out moisture and carbon dioxide.
Quinzhee shelters take time and effort, but they’re sturdy and insulating, making them a reliable option when other resources are limited.
4. Tree Pit Shelter
For those in areas with deep snow and dense tree coverage, a tree pit shelter is a fast and efficient option. Built around the base of a large tree, this shelter uses the natural depth of the snow surrounding the trunk to provide insulation. It’s a quick shelter that requires minimal energy but provides excellent wind protection and a compact, insulated space.
How to Build a Tree Pit Shelter
- Select a large evergreen tree: Find a tree with heavy branches that provide natural cover. The thicker the tree, the more wind protection it offers.
- Dig a pit around the trunk: Use a shovel or your hands to dig a pit about 3-4 feet deep at the base of the tree, using the tree’s natural branches to shelter the area.
- Layer the pit with insulation: Place leaves, pine boughs, or any insulating material on the floor of the pit to create a barrier between you and the cold ground.
- Cover the entrance: Use snow, branches, or a piece of clothing to cover part of the pit opening, reducing drafts and retaining heat.
This shelter is best for short-term survival as it offers limited space, but it’s easy to set up and uses minimal energy.
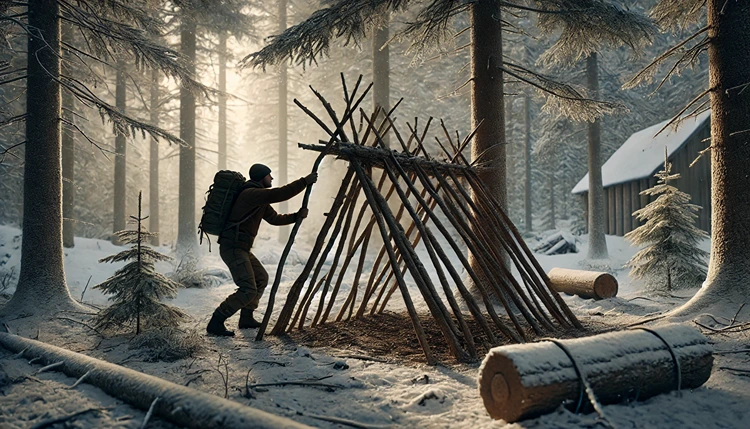
5. A-Frame Shelter
The A-frame shelter is sturdy and provides good protection against snow and rain. It’s an ideal option if you have a tarp or large branches on hand and can be combined with insulation materials to trap heat effectively.
How to Build an A-Frame Shelter
- Set up the ridgepole: Find two trees about 6-8 feet apart and secure a horizontal ridgepole between them.
- Lay branches along the ridgepole: Place branches at a 45-degree angle along both sides of the ridgepole, forming a steep roof that deflects snow and rain.
- Layer with insulation: Cover the roof with pine branches, leaves, or any available insulating material to trap heat and prevent wind from entering.
- Cover the entrance: Use a tarp, branches, or even your backpack to partially block the entrance, reducing wind exposure.
The A-frame shelter is versatile and provides excellent coverage, making it a solid choice for colder environments where snow or rain is a concern.
Helpful Hint:
If you have a space blanket, position it on the inside of your shelter. This reflects body heat back into the shelter, keeping you warmer with minimal effort.
Essential Materials for Cold Weather Shelters
Building an effective shelter in cold weather often requires materials that can trap heat, create a barrier against wind, and provide insulation from the ground. While nature offers many of these materials, certain items are helpful to carry whenever you’re heading into a cold environment. Here’s a list of essential materials and their uses for shelter building.
Natural Insulation Materials
- Pine Boughs: Excellent for ground insulation, bedding, and roof coverage. Pine boughs trap heat and block wind effectively.
- Snow: Acts as an insulating material when piled onto shelters like quinzhees or snow caves. Snow traps warmth inside and blocks cold winds.
- Dead Leaves: Layered leaves can create effective ground insulation and be used in the walls of shelters to reduce heat loss.
Survival Kit Additions
If you’re venturing into potentially cold environments, consider adding these materials to your survival kit for quicker and more effective shelter construction:
- Tarp: Tarps are versatile and can serve as a roof for lean-tos, A-frames, or even basic windbreaks.
- Space Blanket: Space blankets reflect body heat and are highly effective when placed inside shelters to retain warmth.
- Rope or Paracord: Used to secure structures, create frames, and hang tarps or ridgepoles. Paracord is lightweight and strong, making it an essential item for shelter-building.
Tips for Staying Warm Inside Your Shelter
Once your shelter is built, staying warm inside becomes the next priority. Cold weather survival shelters can only do so much if additional warmth is lacking. Here are practical tips to keep warm, even in the chilliest conditions.
Use a Sleeping Pad or Insulation Layer
One of the primary ways the body loses heat is through direct contact with the cold ground. A sleeping pad or a thick layer of natural insulation, like pine boughs or leaves, helps prevent this heat loss and keeps you more comfortable throughout the night. If you don’t have a sleeping pad, add multiple layers of available insulation materials.
Wear Layers and Dry Clothing
It’s important to maintain layers and avoid sweating, which can lead to rapid heat loss once you stop moving. Wearing layers, particularly moisture-wicking ones, helps manage your body temperature and keeps you warm. Additionally, avoid wearing damp clothing inside your shelter as it cools the body rapidly.
Position Yourself to Maximize Warmth
If you’ve built a shelter with a fire, position yourself as close as safely possible to the reflected heat. For snow shelters like quinzhees or snow caves, sleep on a raised platform if possible, as cold air tends to settle at lower levels. If you’re in a small shelter, wrap yourself in a space blanket to reflect your body heat back towards you.
Maintain Shelter Ventilation
Keeping your shelter ventilated is essential, especially in enclosed shelters like snow caves or quinzhees. Condensation from breathing can dampen the shelter, leading to colder conditions over time. Use a small ventilation hole or make sure there’s a slight opening to allow moisture to escape, preventing dampness from chilling the air inside.
Common Mistakes to Avoid When Building Cold Weather Shelters
Building a shelter in cold weather comes with its own unique set of challenges. Small mistakes can lead to discomfort or even danger, so it’s essential to avoid common pitfalls. Here are some mistakes to be mindful of while constructing your cold weather shelter.
Ignoring Insulation
Insulation is crucial for cold weather shelters, especially from the ground. Avoid lying directly on cold surfaces, as this leads to rapid heat loss. Always add layers of insulation between yourself and the ground to keep warm.
Failing to Check Structural Stability
Snow and branches can be surprisingly heavy. Make sure your shelter structure is stable before settling in, especially for snow caves, quinzhees, and lean-tos. Weak structures risk collapse, which can be dangerous in snowy conditions. Reinforce your shelter where necessary to avoid accidents.
Choosing Poor Shelter Locations
Choosing the wrong spot to set up your shelter can expose you to additional wind, dampness, or snow accumulation. Avoid setting up at the bottom of valleys, next to water sources, or in areas where snow could fall on the shelter. Look for higher ground with natural windbreaks if possible.
Advanced Shelter Techniques for Extreme Cold
In extremely cold environments, building a standard shelter may not be enough. Advanced techniques can help trap more heat, create a wind-resistant barrier, and provide extra insulation. Here are some strategies for enhancing your shelter when facing severe cold or prolonged exposure.
Double-Wall Insulation
In very cold conditions, consider using double-wall insulation to trap more air and reduce heat loss. This can be done by building an outer layer around your main shelter structure, with a small gap between the walls. This gap acts as an insulating buffer, similar to how double-pane windows work.
How to Add Double-Wall Insulation
- Create the inner wall: Build your main shelter wall using available materials like branches or snow.
- Build an outer layer: Add a second layer of branches, leaves, or snow a few inches away from the inner wall.
- Fill the gap: If possible, fill the space between walls with loose leaves, pine boughs, or any available insulating material.
This technique is time-consuming but provides superior insulation, making it an excellent option for long-term cold weather shelter.
Utilizing Reflective Heat Sources
One way to increase warmth inside your shelter is to use a reflective heat source, such as a space blanket or even a reflective tarp. When placed behind a fire or hung inside the shelter, reflective materials can direct warmth back towards you, amplifying the effectiveness of your fire or body heat.
Helpful Hint:
For a more effective setup, place a rock wall or log pile behind your fire. The heated materials will radiate warmth into your shelter long after the fire dies down.
Testing and Practicing Shelter Building Skills
Survival shelter-building techniques are best practiced before you find yourself in an emergency. Familiarity with building various types of shelters in different conditions will improve your ability to make sound decisions quickly. Here’s how to effectively practice your cold weather shelter-building skills:
Practice in Different Weather Conditions
Each season and weather type presents unique challenges for shelter building. Practicing in snow, rain, and windy conditions will help you understand the impact of these elements on the stability and warmth of your shelter.
Use a Timer
In an emergency, time and energy are limited. Try timing yourself while building different shelters to see how long each type takes. This will help you make quick decisions on which shelter to build, based on your available resources and energy level.
Experiment with Materials
Different materials offer different levels of insulation, sturdiness, and warmth. Experimenting with a variety of natural and man-made materials can give you a sense of which ones perform best. For example, pine boughs might be easy to find in some areas, while dead leaves might be more available in others.
Preparing for Cold Weather Survival
The best way to ensure cold weather survival is to prepare before venturing into the wilderness. Preparation not only makes shelter building easier but also reduces the likelihood of mistakes that could cost you time, energy, or even safety. Here are essential steps to take before heading out:
Carry Essential Gear
- Fire Starting Kit: A reliable fire source, such as waterproof matches or a firestarter, can be a lifesaver in cold weather.
- Tarp or Space Blanket: These items are lightweight and versatile, making them invaluable for creating quick shelters or providing added insulation.
- Insulating Clothing: Pack thermal layers, waterproof outerwear, and extra socks to prevent heat loss.
Know Your Route and Climate
Understanding the climate and topography of the area you’re visiting can give you insights into what types of shelter you might need. Cold weather varies in severity depending on altitude, proximity to water, and seasonal shifts. Knowing these factors helps you anticipate the challenges you’ll face and plan accordingly.
Prepare a Survival Plan
Before heading out, create a plan for what you’ll do if you need to shelter in place. Share this plan with someone you trust so they’re aware of your route and expected return time. Having a set plan can reduce panic and help you make better decisions if you find yourself needing shelter.
Frequently Overlooked Shelter Building Tips
Cold weather shelter building involves both practical skills and a bit of creativity. While the fundamental techniques are essential, there are a few additional tips that many overlook but can make a big difference in comfort and safety.
Using Ground Sheets
Ground sheets, such as a tarp or even thick foliage, create a barrier against the cold ground and help retain body heat. They’re easy to overlook, but they provide critical insulation from the frozen ground.
Reinforcing with Snow
If you’re using branches or a tarp, consider reinforcing your shelter walls with snow. Snow has excellent insulating properties, so adding it around your shelter can increase warmth and block wind.
Creating a Snow Trench
In situations with deep snow and limited tree coverage, digging a snow trench can provide a quick and effective shelter. This technique is fast and uses minimal energy while offering significant protection from wind and cold.
Key Takeaways for Shelter Building in Cold Weather
- Location is Critical: Always choose a spot that offers natural windbreaks and is above low areas where cold air settles.
- Insulation Is a Priority: Insulating your shelter, especially from the ground, is essential for retaining heat.
- Ventilation Matters: Ensure your shelter has ventilation to prevent moisture buildup and improve air quality.
- Practice Builds Confidence: The more you practice shelter-building skills, the faster and more effectively you’ll respond in a real cold weather survival situation.
Pros and Cons of Cold Weather Shelters
Pros
- Provides critical protection from wind and cold, reducing the risk of hypothermia.
- Enables better heat retention by using natural insulation like snow or leaves.
- Different shelter types allow versatility based on weather conditions and available materials.
- Can be constructed relatively quickly with basic outdoor skills, improving survival chances.
- Improves overall comfort and rest quality in cold survival situations.
- Utilizes natural materials, minimizing the need for extra gear or supplies.
Cons
- Requires physical energy, which may be limited in survival situations.
- Some structures, like snow caves, need time to construct and settle, which may not be feasible in emergencies.
- Building the shelter in extreme cold or windy conditions can be challenging and risky.
- Relies heavily on the availability of natural materials, which might not always be accessible.
- Structural stability can be an issue if not built correctly, increasing the risk of collapse.
- Ventilation management can be difficult, leading to issues with moisture and condensation.
Frequently Asked Questions
Wrapping Up
Cold weather survival requires more than just grit; it demands knowledge and preparation. Understanding and practicing effective shelter building techniques can make the difference between life and death in freezing conditions. Each shelter type has unique strengths, so familiarizing yourself with options like lean-tos, snow caves, and quinzhees equips you for a variety of environments. When setting up a shelter, always prioritize insulation, ventilation, and location for maximum warmth and safety.
Remember, these shelters don’t require fancy equipment. With basic materials and a bit of know-how, you can create a reliable shelter to keep the cold at bay. Whether you’re exploring the wilderness or preparing for emergencies, these skills will serve you well in any cold weather survival scenario. Stay prepared, stay safe, and remember—your knowledge and skills are your best tools in the wild.